With the help of AI image generators, you are now able to create your very own custom stickers without drawing everything by hand. But you still might be completely lost as to how you go about doing that from beginning to finish.
In this post, I’m going to show you step-by-step what you need to do and what you should use at each step along the way using only free tools. I’ll also give you some samples that I created, using this exact method.
So let’s get started!
Step 1. Creating A Sticker Design With AI
The first step is generating a nice sticker that you like.
To do this we will use a free AI image generator. You can use any AI image generator of your choosing for this step, but when it comes to picking from the free options, I would use either Ideogram.ai or Bing’s Copilot Designer.
For this tutorial, I’m going to use the image generator from Bing.
Go to Bing Copilot Designer and sign up for a free account.
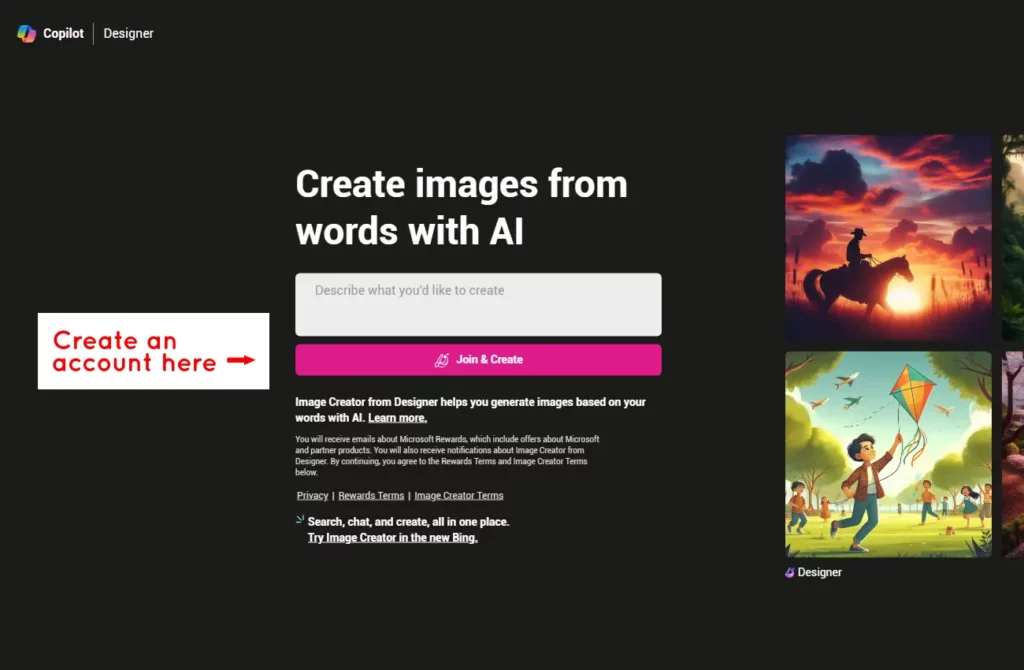
Once you have an account, go back to the page above and let’s begin making our sticker art!
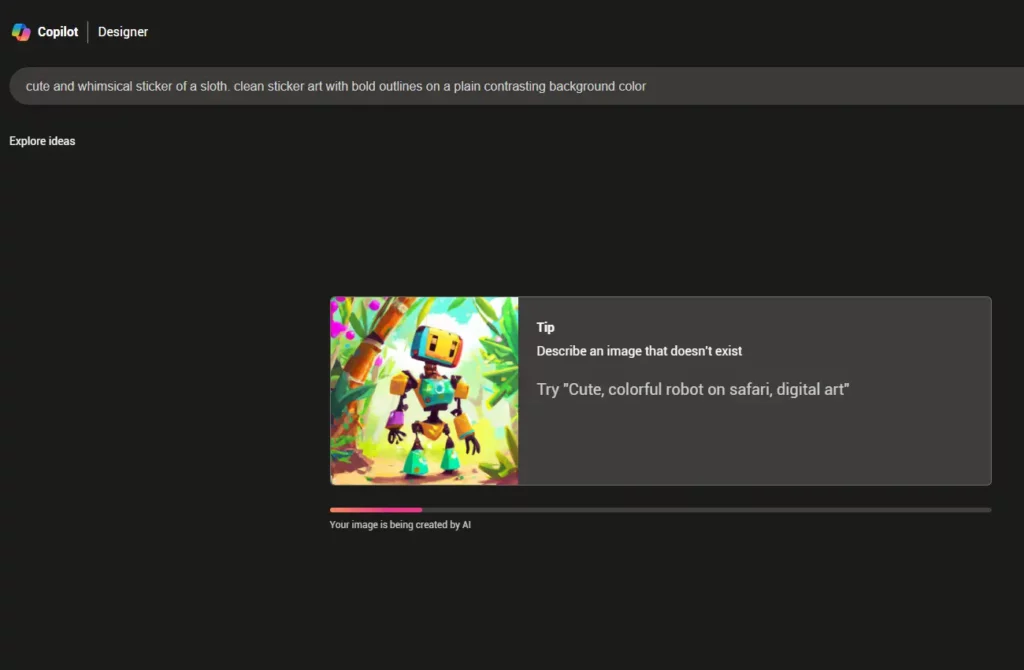
In the text box, type in what you want your sticker to be of. Be sure to use terse, descriptive text that explains what the sticker should be, while making it clear that you want a sticker. For example, this is what I used:
cute and whimsical sticker of a sloth. clean sticker art with bold outlines on a plain contrasting background colorNote how I instructed the sticker to be on a plain contrasting background color. This will make cleaning up the image easier later on.
When you are ready, click the ‘Create’ button that is to the right of the text box.
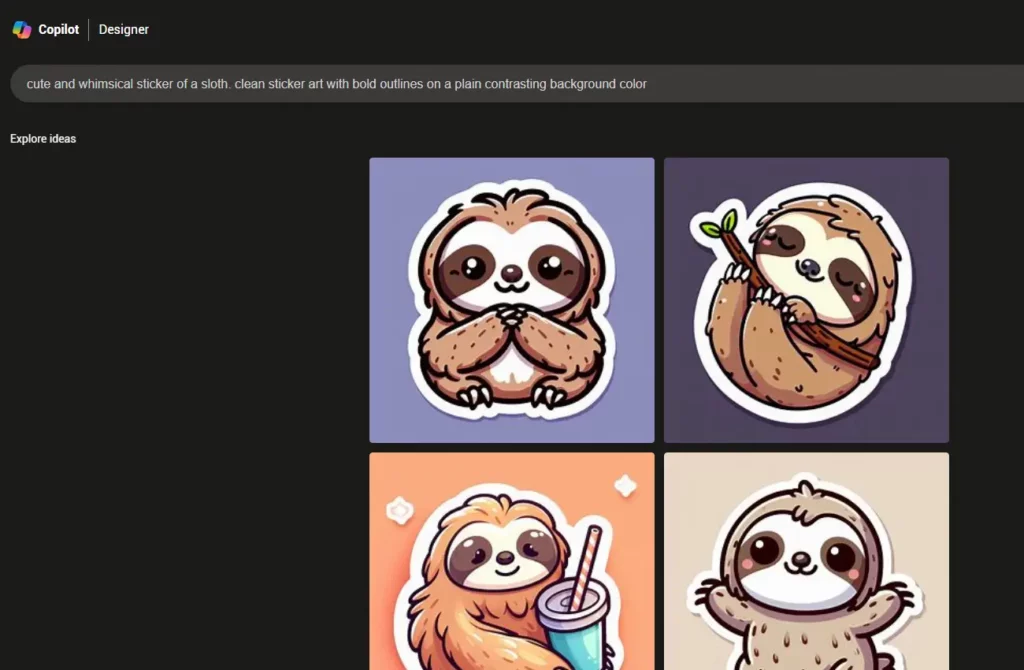
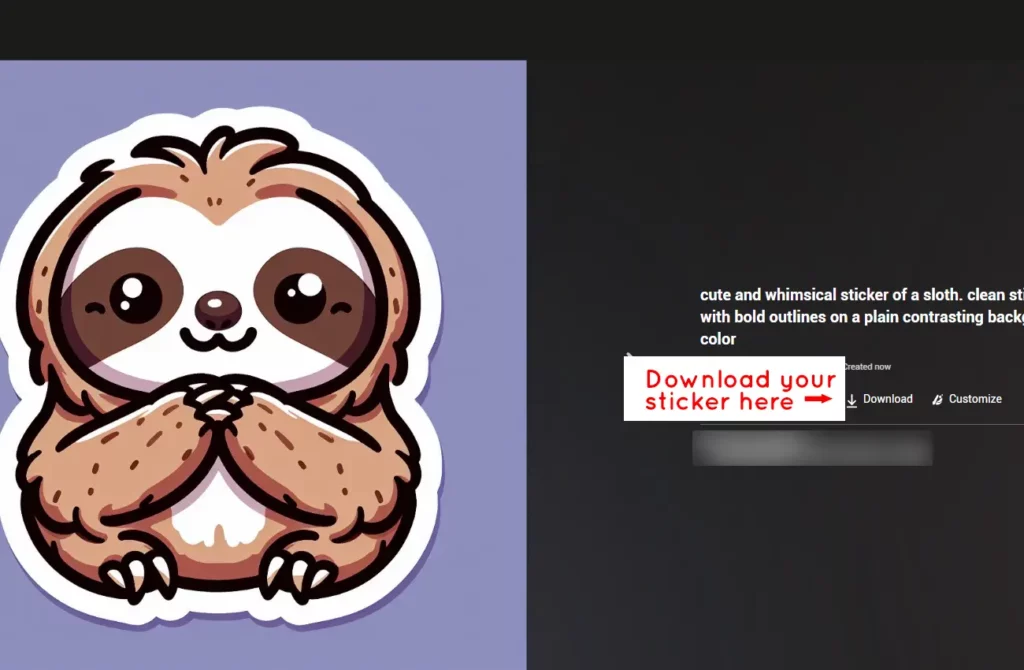
Once you find an image that you are happy with, click on the image, and then click the download button that is next to the info on the image you created.
Step 2. Cleaning Up Your Sticker Design With GIMP
You can’t really use the image that you just created in it’s current format. So now, let’s clean it up and prep it into a sticker that we can actually use.
To do this let’s download the free image editing software GIMP. You can download GIMP for Linux, Mac, or Windows from this link.
– Install GIMP on your computer and open up the app.
Within GIMP, open up your sticker image by going to File -> Open.. and then locate where your image is on your computer, most likely, the Downloads folder.
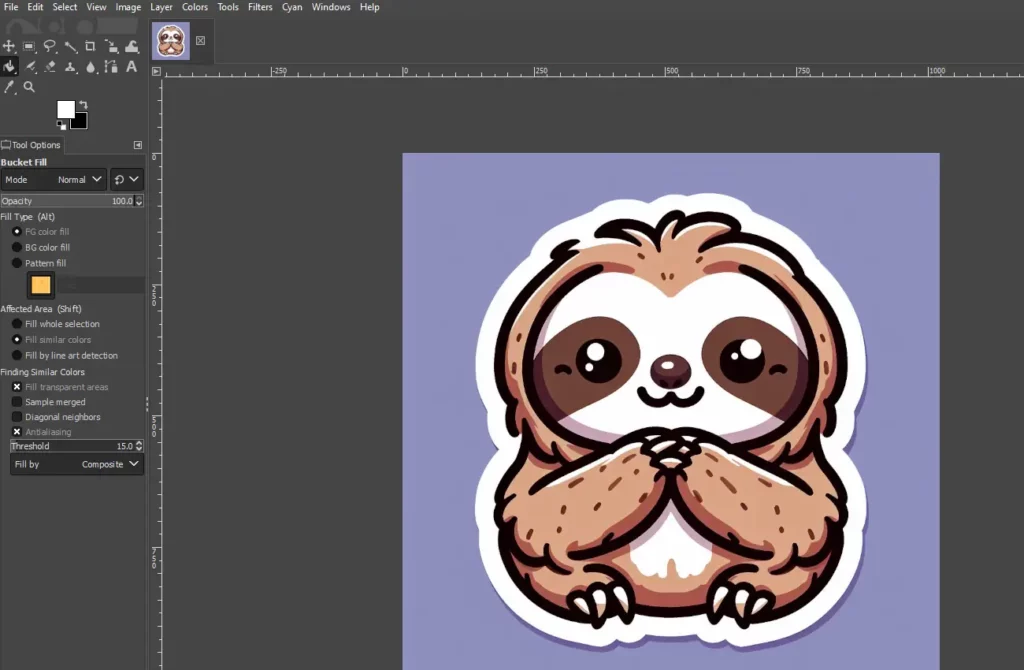
Next, we’re going to add an alpha channel to the layer with the image so that we can have a transparent background for our design. Right click on the image layer in the lower right panel and click ‘Add Alpha Channel’.
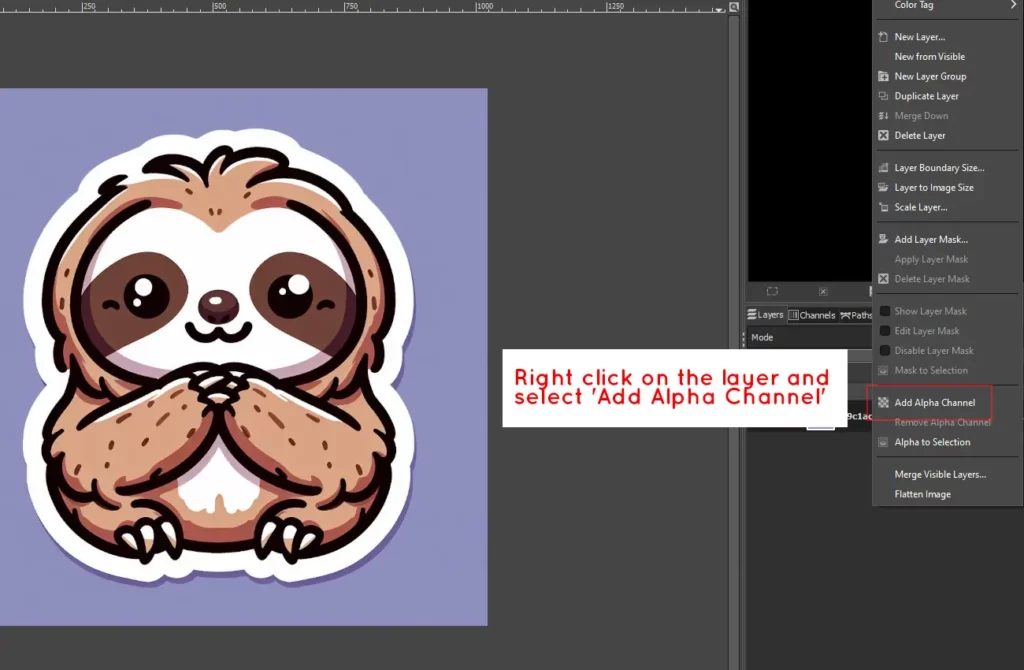
Now we are going to delete the entire background of the image, including the white border that the sticker has.
To do this, we will grab the ‘Fuzzy Select Tool’ from the tool panel in the top-left. Ensure that ‘Add To Selection’ mode is also enabled as instructed in the image below.
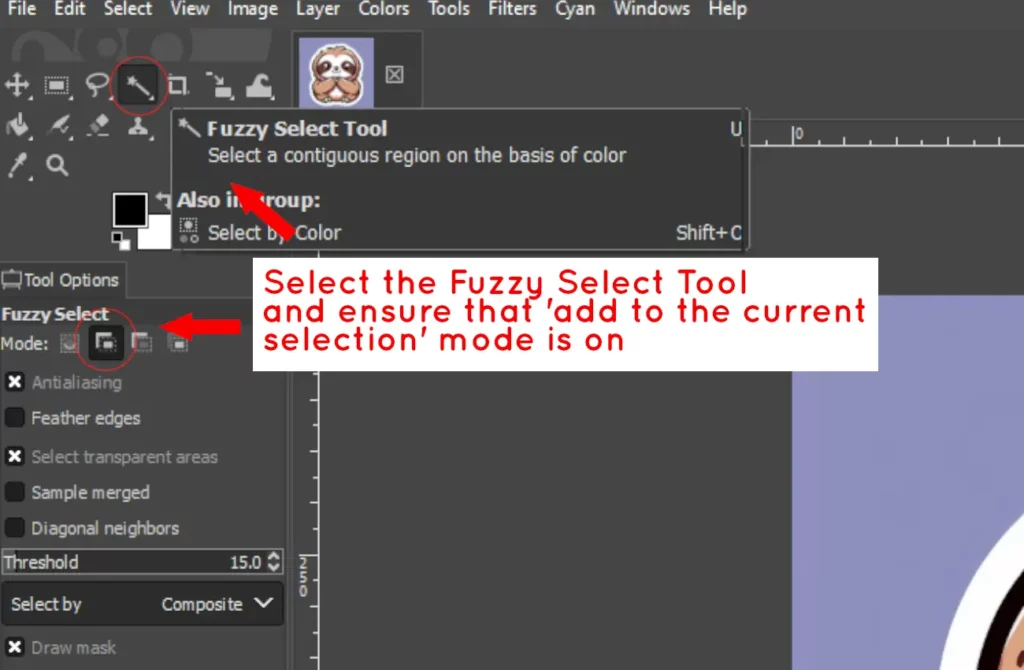
Click and hold anywhere in the background of your image. As you drag to the right, you will notice pink highlights growing to cover a larger portion of the image. This is the threshold value and will determine how large of a color difference the tool will select from your image. You want to drag until only the background of the sticker is highlighted in pink, and none of the sticker itself.
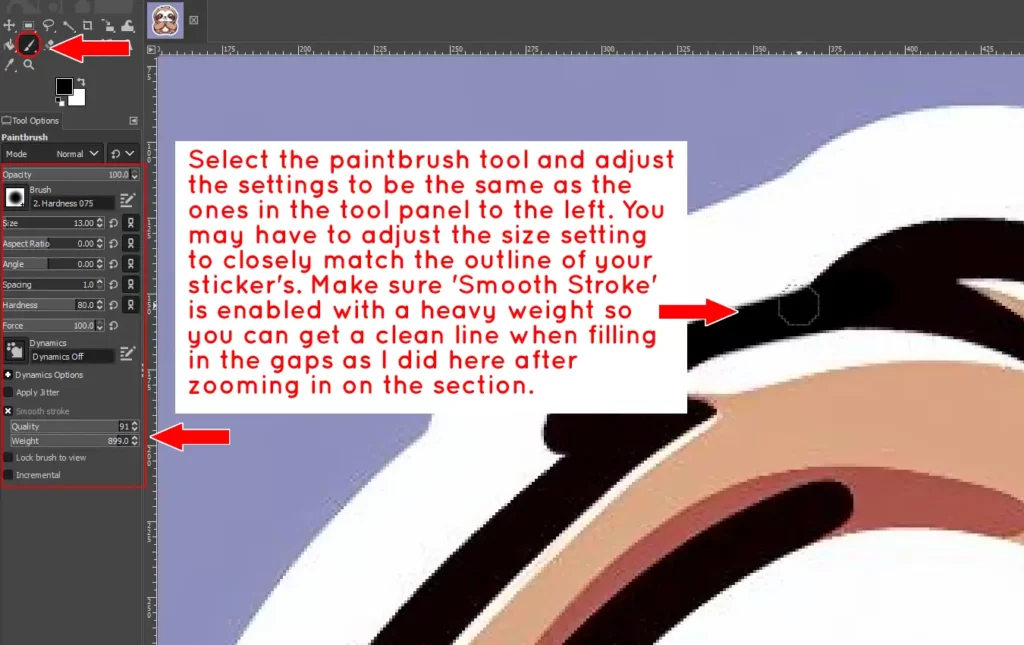
When using the fuzzy select tool to select the background of an image, it may inadvertently select portions of the image you want to keep, even when trying to be precise. This issue likely arises from gaps in the outline of your sticker that the image generator failed to complete. In such cases, use the paintbrush tool, zoom in between 400-800%, and fill the gaps with solid black. Once all gaps are filled, you should be able to fully select the background without selecting any part of the sticker itself.
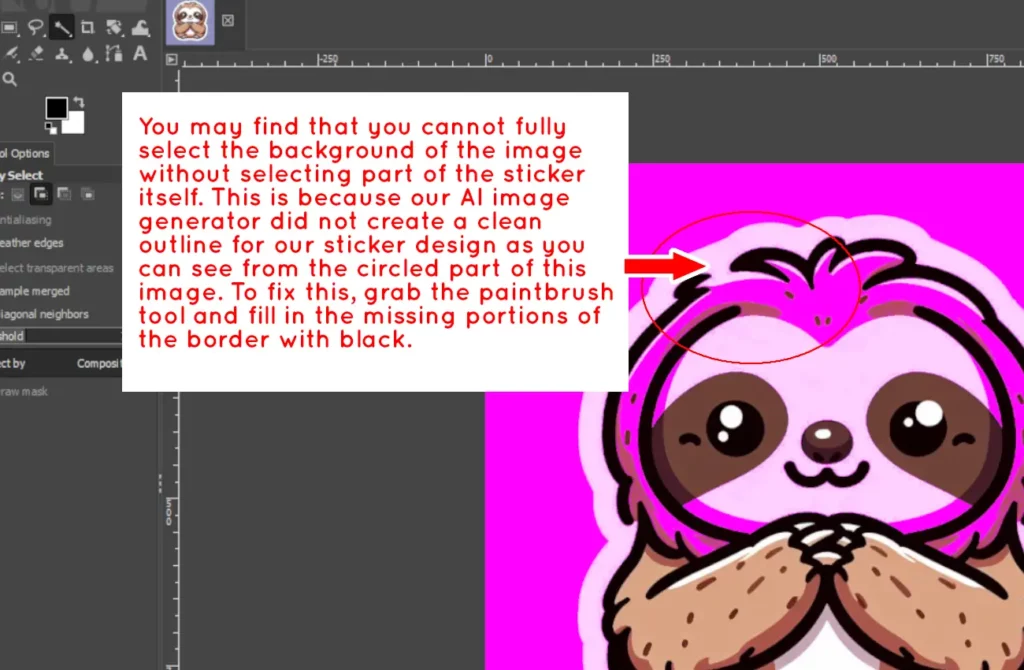
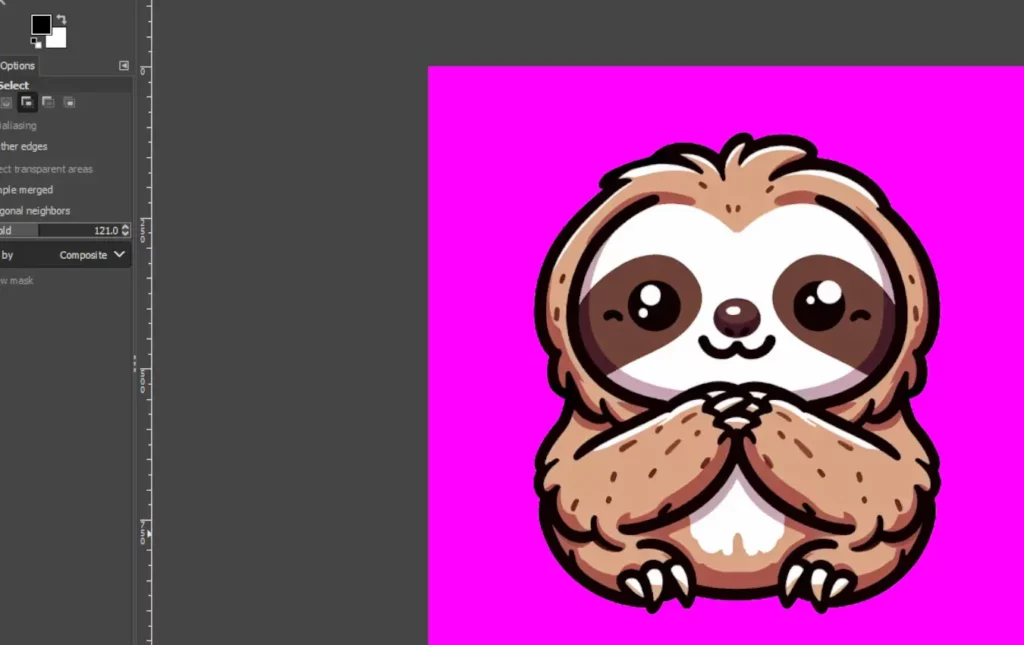
Once you have the entire background of the design highlighted pink, you can release the click and it should now give you a selection of that background portion of the image. You can now press the ‘Delete’ key on your keyboard.
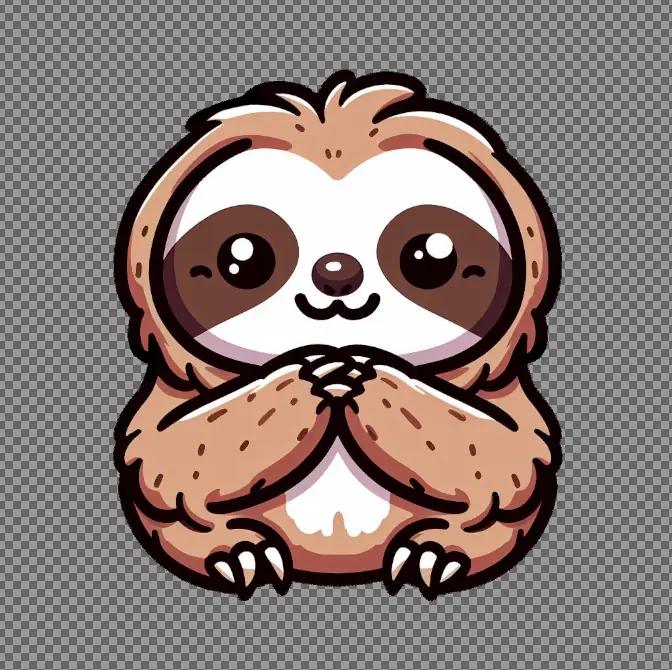
You should now have your design sitting on a checkerboard pattern (the checkerboard represents transparency).
To save this design with a transparent background go to File -> Export As..
Choose a folder to save this sticker to and name the file with an extension of ‘.png’ in the text box. Then click ‘Export’ and in the dialog box that pops up, once again, click ‘Export’ with the default settings.

We now have an image with a transparent background that we can have printed to be an actual sticker!
Step 3. Printing Your Sticker Design So You Can Use It
The transparent sticker design isn’t going to do us much good until we actually have it printed, so let’s do that now.
You can print this sticker at home if you have the proper printer and vinyl sticker paper. Here is a WikiHow guide on how to do that.
Or if you do not have the proper materials to do this at home, you can upload your sticker design to a print-on-demand website and order as many stickers as you’d like, which can then be shipped to your home.
In my experience, I’ve found Sticker Mule to have good quality for custom stickers. You can visit their die cut stickers page here to upload your sticker image and order as many stickers of your design as you’d like.
While Sticker Mule is one option for printing custom stickers, the process is pretty similar across other websites offering this service. Choose whichever custom sticker website you prefer.
A few of the other popular print-on-demand custom sticker websites you could use are:
And that’s it! If you wanted to take this a step further, you could also start a side-hustle selling your stickers online for some extra cash. If you’d like to know how to do that you can read my other blog post: how to sell AI art prints online. While that post doesn’t focus specifically on selling stickers, the same principles can be applied.
If you found this tutorial useful, please be sure to share it on social media! And if you’ve got any questions or comments about this, please leave me a comment below and I will make sure to answer.
Hi, I’m Carmine, the guy behind Helpful Tiger. Tired of crappy search results? Me too. That’s why I started this website. It’s a one-stop shop for simple tutorials and guides on a little bit of everything. Have questions? Reach out, and I’ll do my best to help!


